To All Players
To all CS:GO Major Championship Players:
During CS:GO Major Championships, we make “Player Autograph” items available for fans. The goal is to provide some of the experience a fan would have had if they attended the event and asked you to sign a mousepad. Fans can purchase autograph items, and you receive a portion of the proceeds.
The technical instructions for submitting an autograph item are below. Additionally, you should follow these guidelines, otherwise your autograph item may be rejected:
Because of the time it takes to acquire a Tax ID and setup payment information, and because the payment information is required in order to submit workshop items, it is important that you do this now whether you are an invitee or a potential qualifying player.
Again, we’re specifically interested in your player autograph, as it would appear during a mousepad signing session. You can get this process started by signing a blank sheet in marker, and taking a photo:
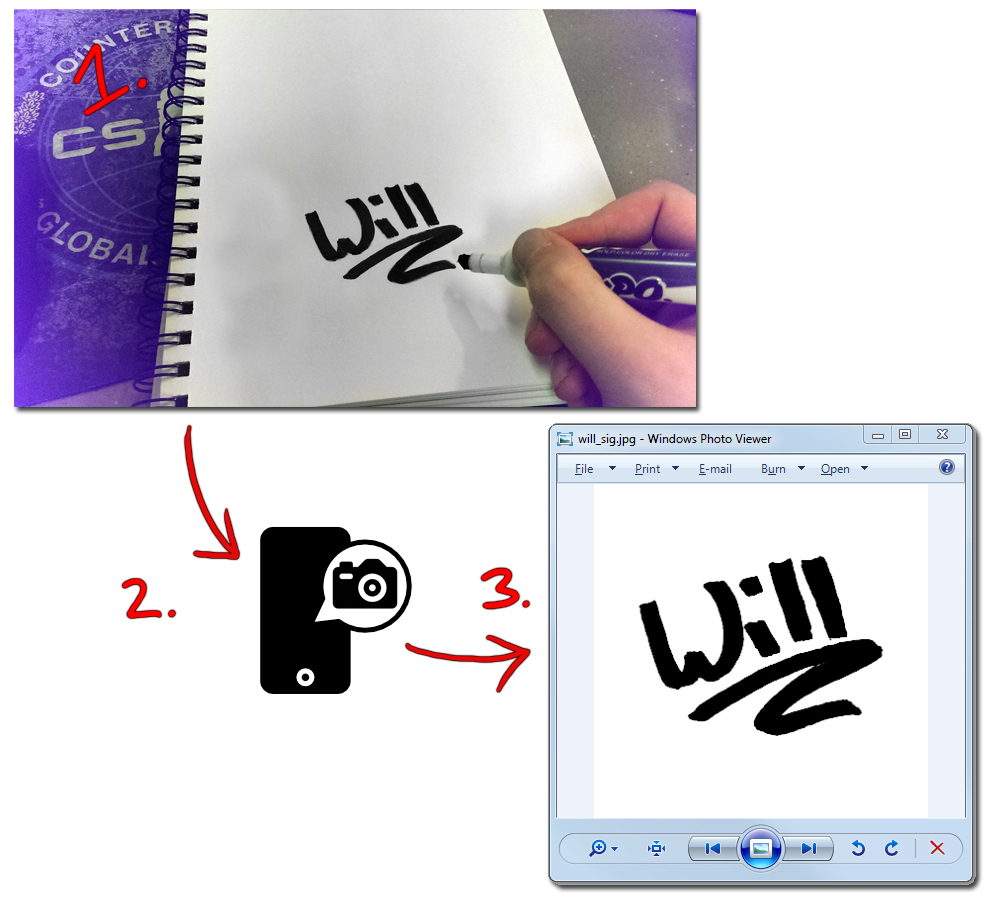
Once this is done, to move forward with an in-game item we need you to create a workshop submission that includes an image of your personal signature, and your payment information.
The easiest way to do this is to submit a hidden sticker item to the workshop.
The account you use in this process MUST be an account owned by you (i.e., not owned by another individual or organization).
Instructions:
Step 1: Submit a hidden sticker item
– Launch CS:GO and open the console.
– Type workshop_publish and press enter.
– Select the ‘Sticker’ option on the right
– Click ‘Add’
– Under Title, enter your name in the format: PLAYER – SIGNATURE
– Create the following folder on your computer – C:\signature
– Save this preview image (submission.jpg) to C:\signature, and add it by clicking “Browse…” under the Preview Image section and selecting the provided .jpg image
– Save this VMT file (submission.vmt) to C:\signature, and add it by clicking “Browse…” next to the VMT option and selecting the provided VMT file
– Add the source image of your signature by clicking “Browse…” next to Base Source Image.
– Check the agreement checkbox, then click “Publish”.
– Once on the webpage featuring your item, change the visibility to ‘Hidden” in the right-side menu.
Step 2: Enter Payment Information
-Click ‘View Legal Agreement’ and accept both licenses.
-On your item’s webpage, click on the ‘Enter Payment Info’ button and fill in your information.
-Enter your personal information. Do not enter information for any other individual or organization.
Step 3: Enter Revenue Sharing Information
-On your item’s webpage, under ‘Workshop Item Revenue Sharing’, only add your personal account and set the revenue percentage to 100%.
-You should not include any other individual or organization as a payee. This item is yours, and yours alone.
Thank you for helping us prepare for the upcoming event.


